ASSEMBLY INSTRUCTION
Kit specially designed for all of the following minibuses with removed rear seats and a loading space width of at least 110cm.
Citroen Spacetourer | Fiat Talento | Ford Tourneo Custom | Hyundai H-1 | Mercedes Viano | Nissan NV 300 | Opel Vivaro B | Opel Zafira Life | Peugeot Traveller | Renault Trafic III | Toyota Proace Verso | VW T4 | VW T5 | VW T6 | VW T7
You will need these materials
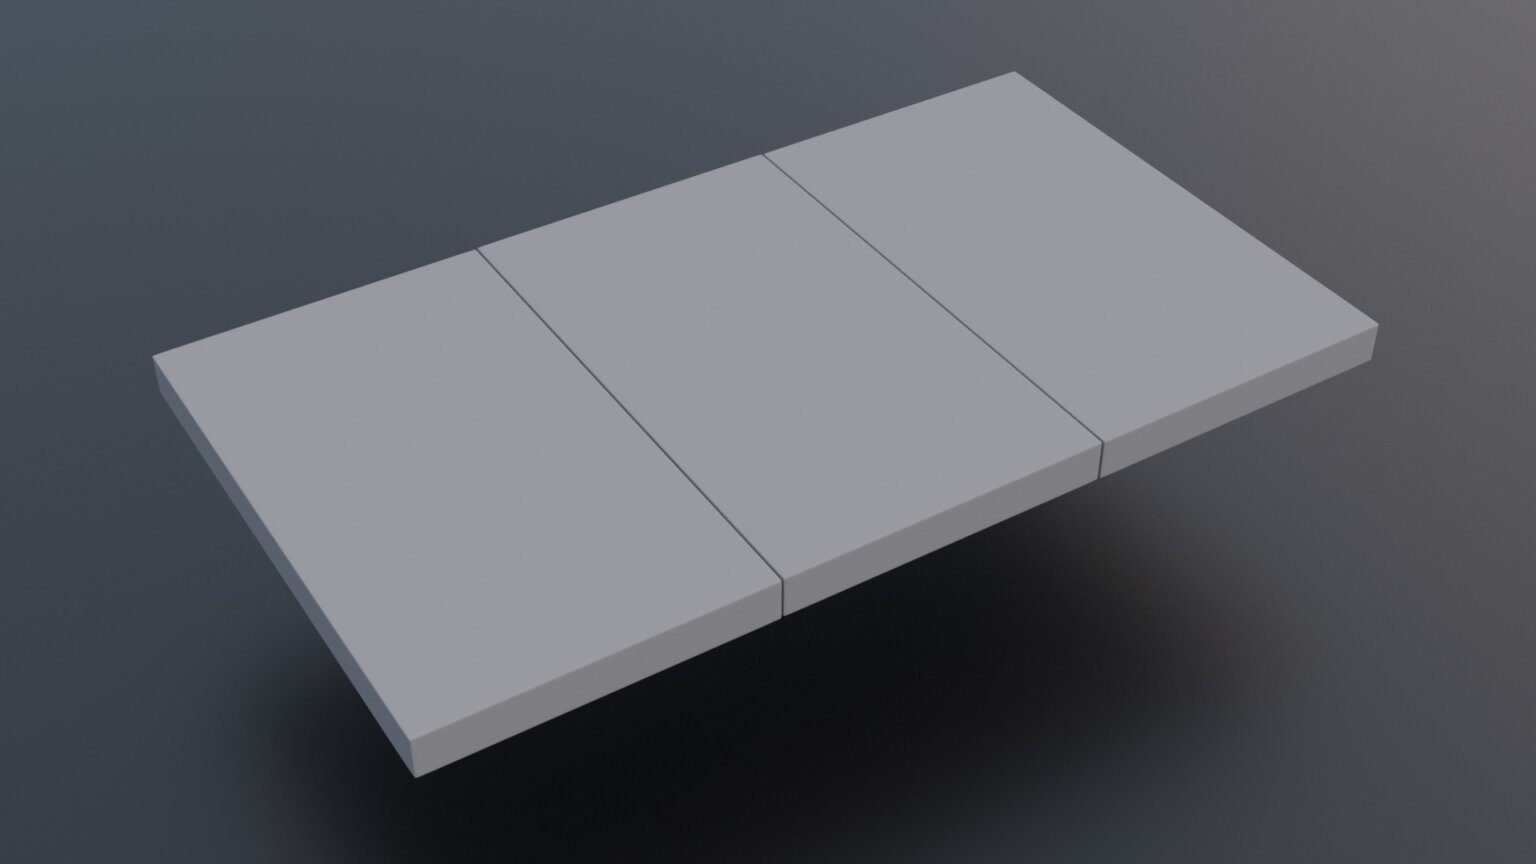
Wood
First, you’ll need to get some wood from a hardware store. These aren’t included with the mobile bed set. However, you can easily have the wood cut to size directly at the hardware store, or simply order it online from Hornbach, for example, and pick it up in the store. The cost is reasonable at around €50.

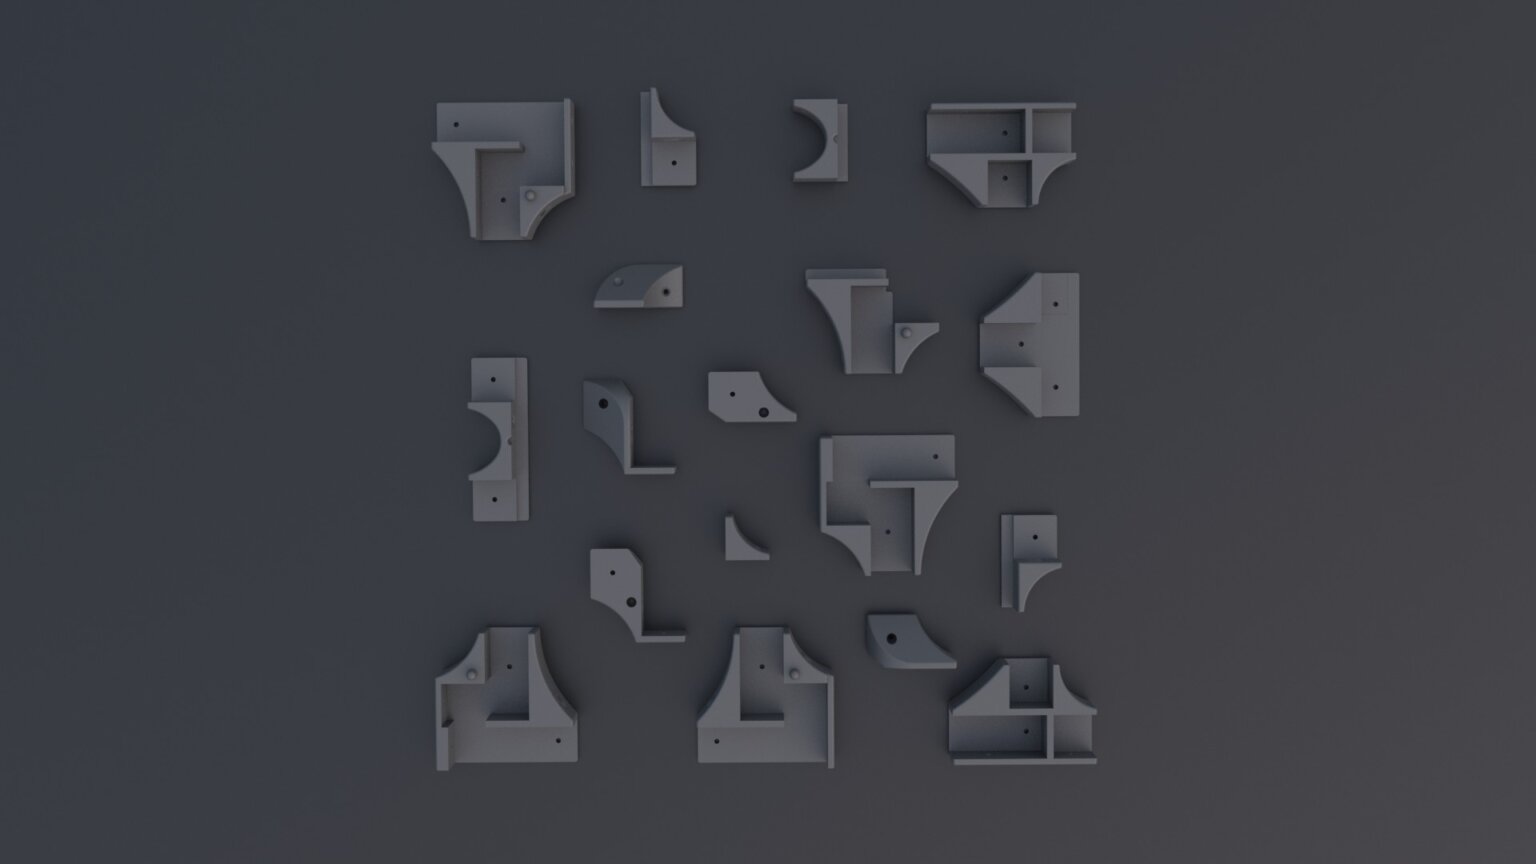
Connector set
Once you’ve purchased all the wood pieces from the hardware store, simply assemble them like a kit using our connectors specially developed for the mobile bed and screw them together. To make it easier to place each piece in the correct position and to prevent potential errors, all pieces are labeled with unique numbers.
Mattress
We recommend using folding mattresses for our car beds. They can be folded up and transported very compactly, and unfolded into a bed in just a few minutes. In our shop, you’ll find suitable mattress models for your car.
Depending on your sleeping comfort, the price for a suitable folding mattress is between €70 and €300.
Step-by-step assembly instruction
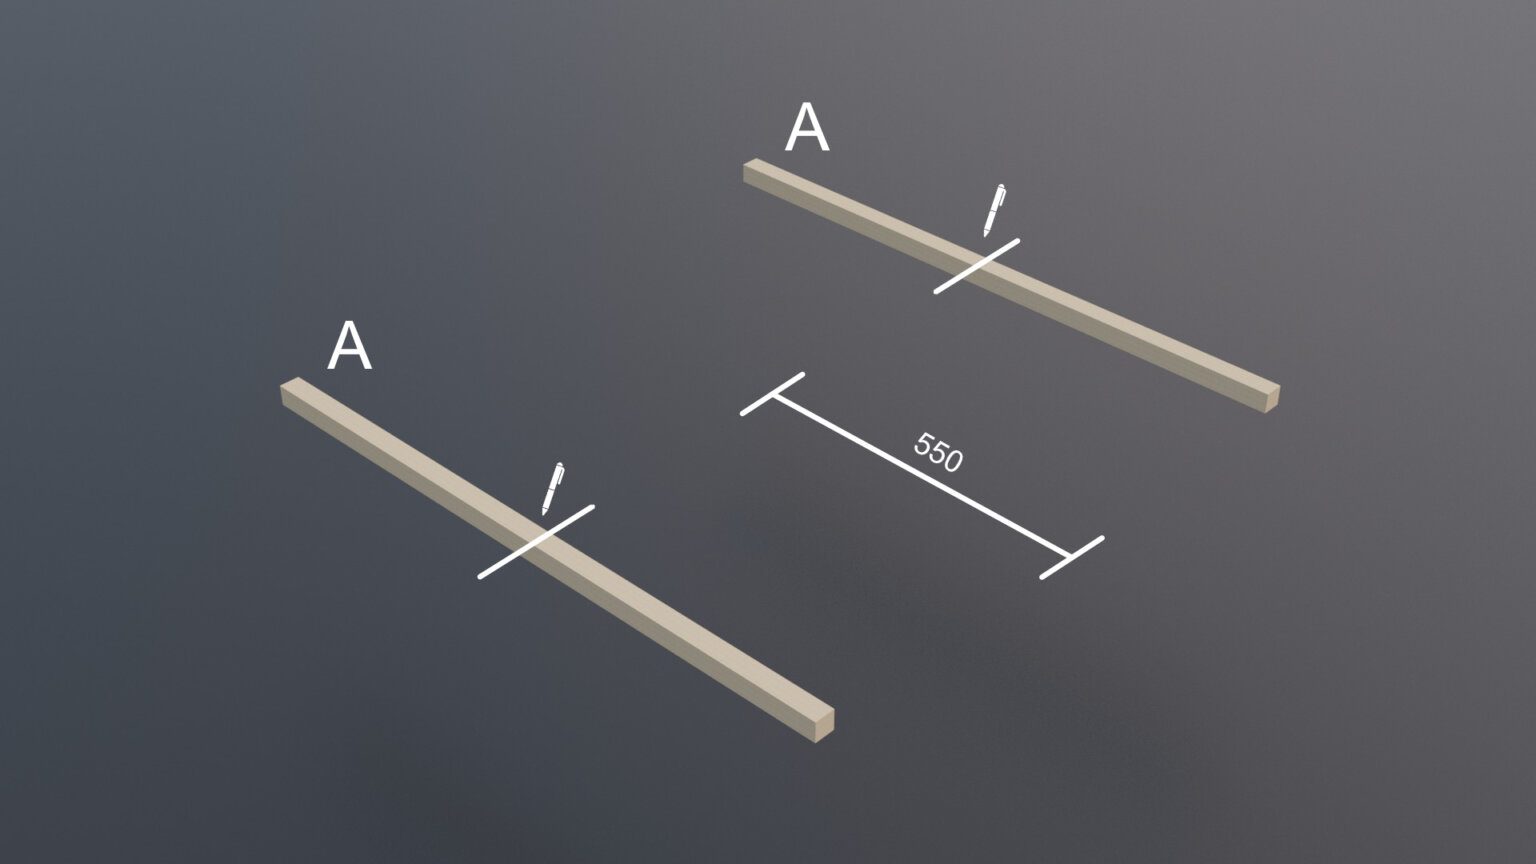
Step 1
First, prepare the two pieces of wood (A) and mark the exact center of each piece. The center is 550mm from the edge.
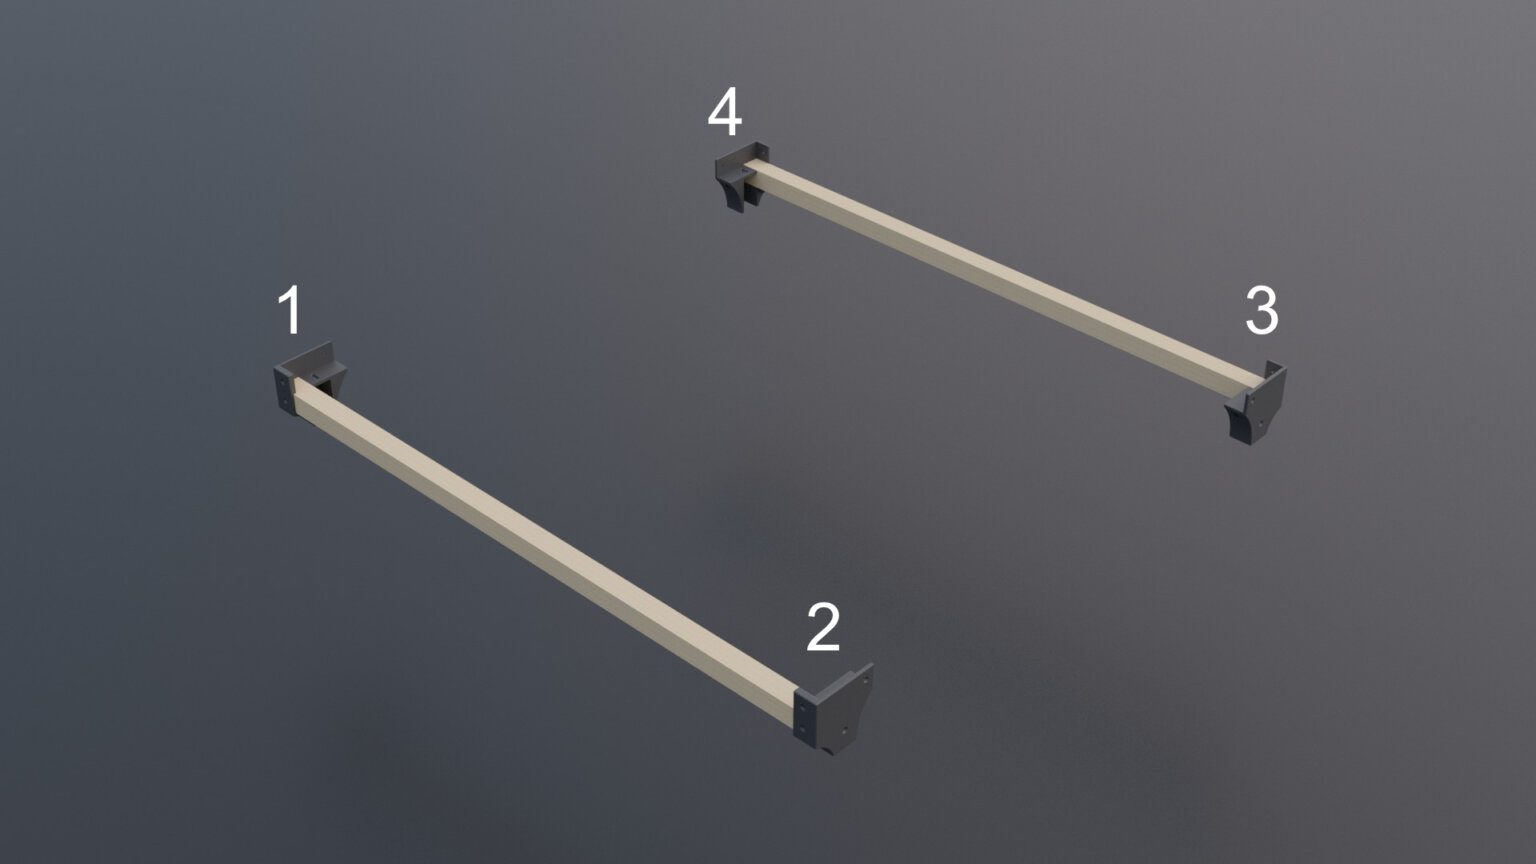
Step 2
Then attach parts (1), (2), (3), and (4) to the respective ends of the pieces of wood, as shown in the illustration. You can screw the connecting pieces directly to the pieces of wood.
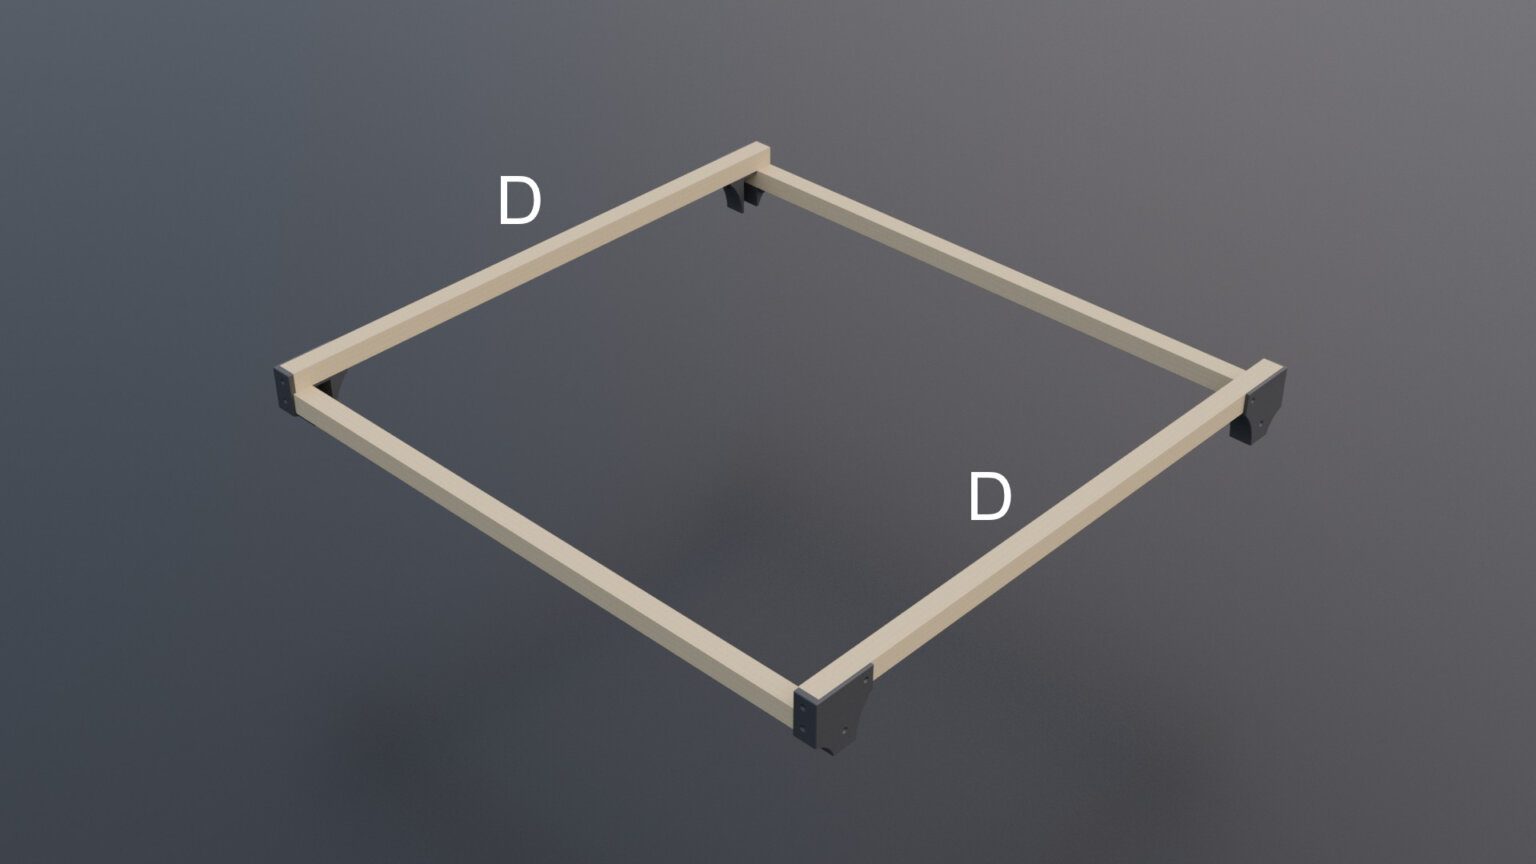
Step 3
Now place two pieces of wood (D) on the outside of the two pieces of wood (A). You can then screw these together again with the connectors.
Step 4
Now add parts (12), (13), (14), and (15) to the wooden frame you’ve just built, as shown in the illustration. The small pins from parts (1), (2), (3), and (4) are inserted into the holes in parts (12), (13), (14), and (15). Screw everything back together.

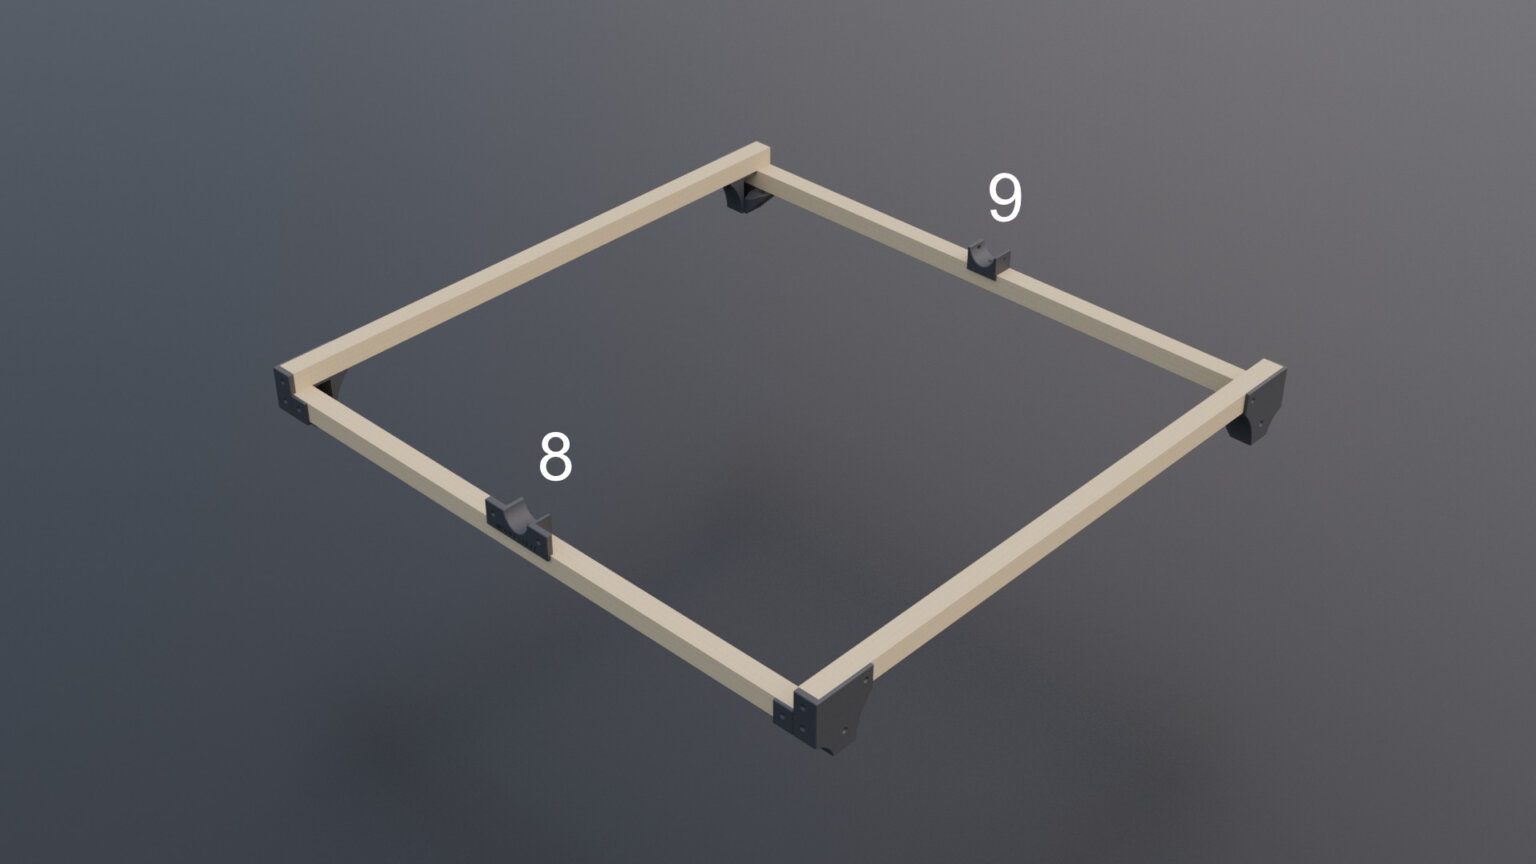
Step 5
Next, parts (8) and (9) are each screwed into the center of the wood A. Parts (8) and (9) have small notches in the center that are placed exactly on the mark from step 3.
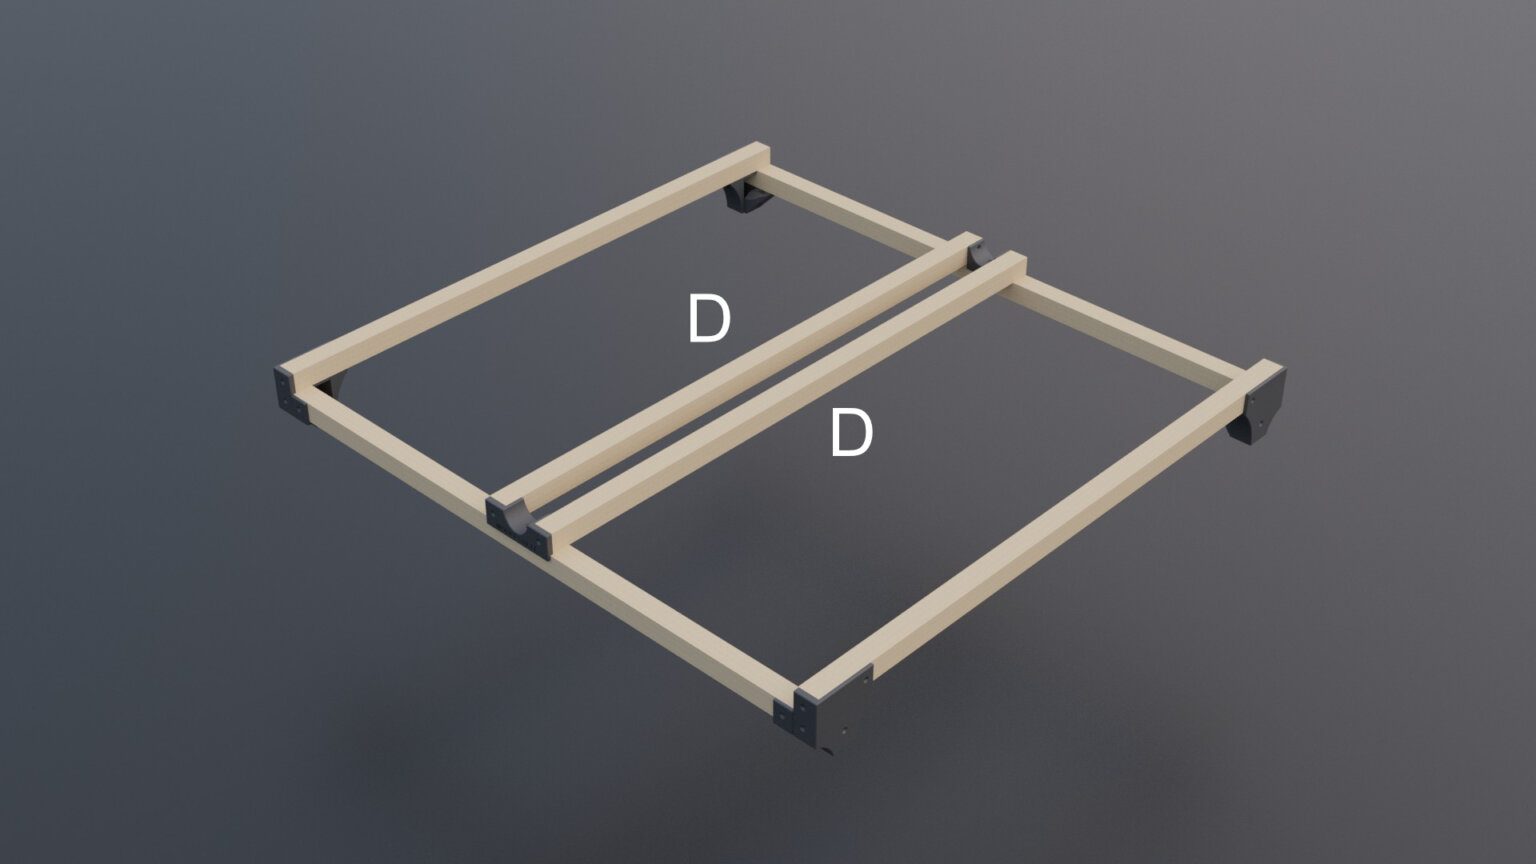
Step 6
Now two more pieces of wood D are placed on parts (8) and (9) and screwed together.
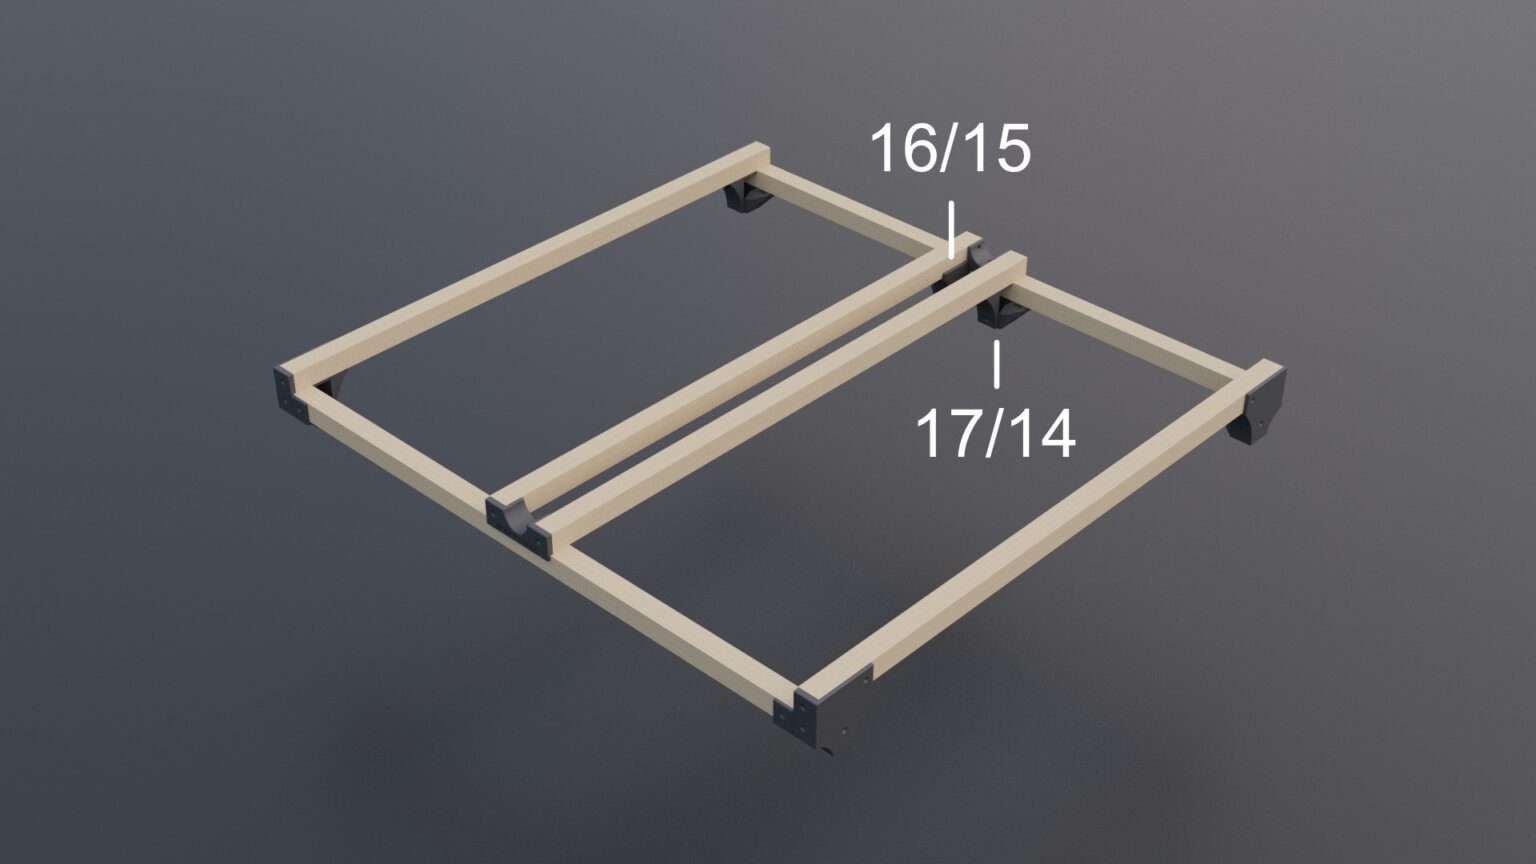
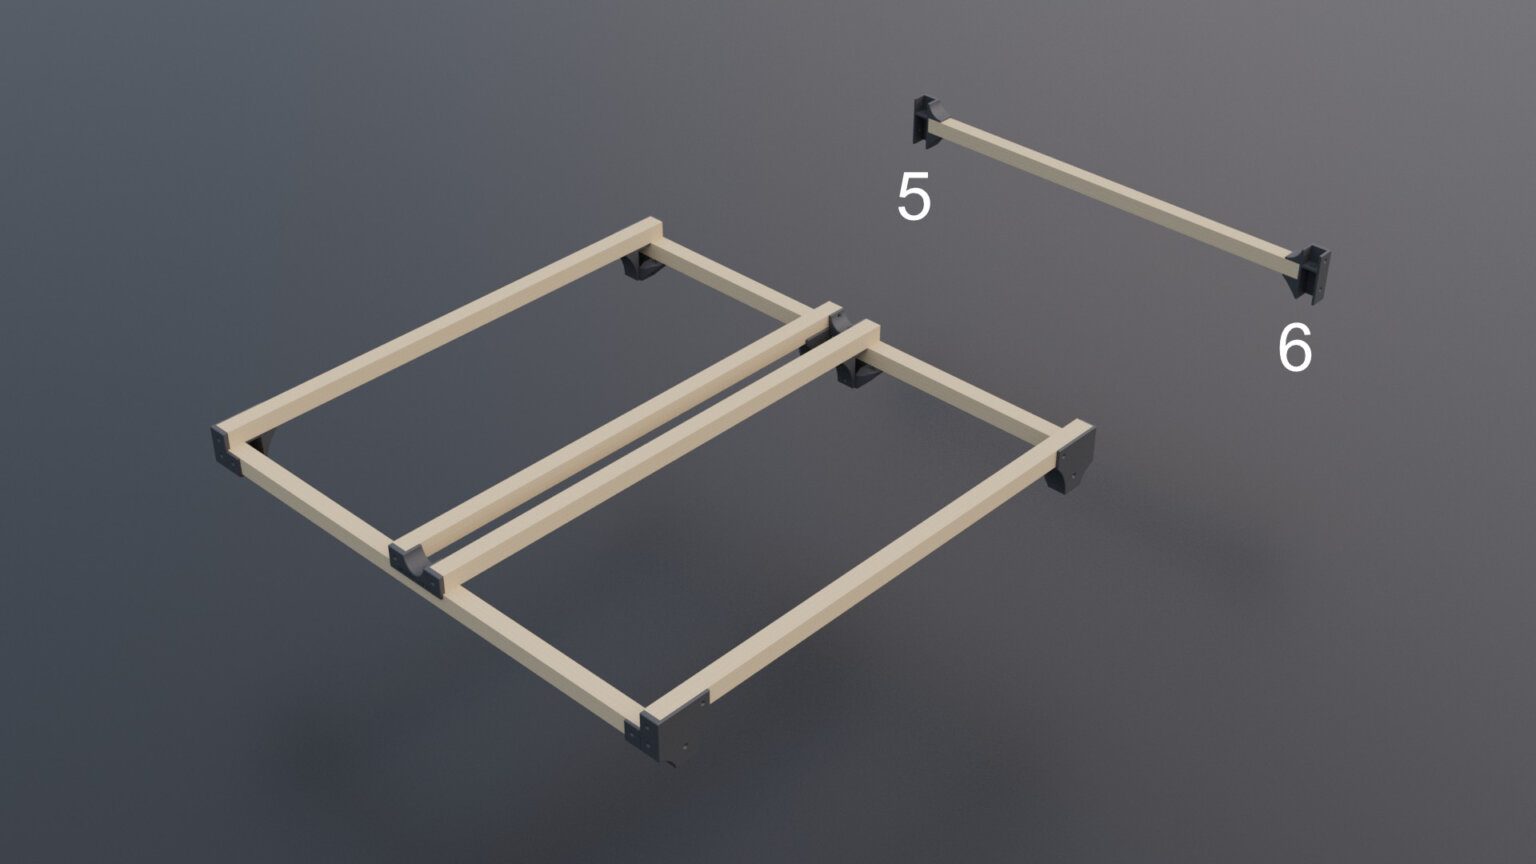
Step 7
Then, parts (15) and (16) are screwed to the front of the left piece of wood D below, as shown in the figure. Parts (14) and (17) are screwed to the front of the right piece of wood D below.
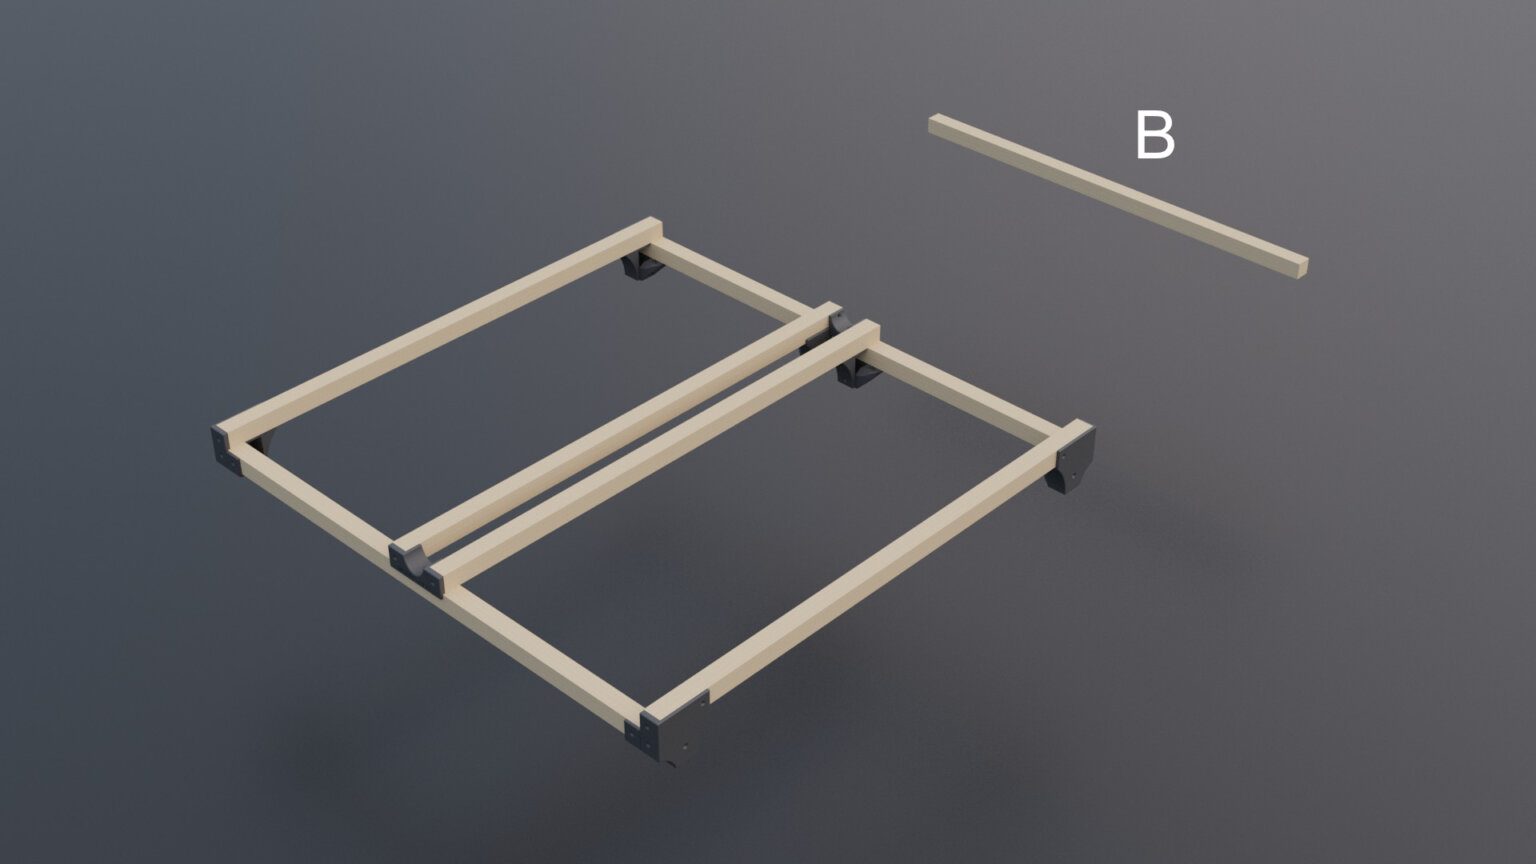
Step 8
In the next step, you’ll prepare wood B. You can place it in front of the rear wooden frame.
Step 9
Now screw parts (5) and (6) onto wood B. Make sure that the smaller recess faces upwards and the larger one faces downwards.
Step 10
Now screw two pieces of wood E onto parts (5) and (6). You can also place pieces of wood B directly onto the rear wooden frame.
Step 11
Part (7) is now screwed into the middle of wood B as a connector for the front middle foot.

Step 12
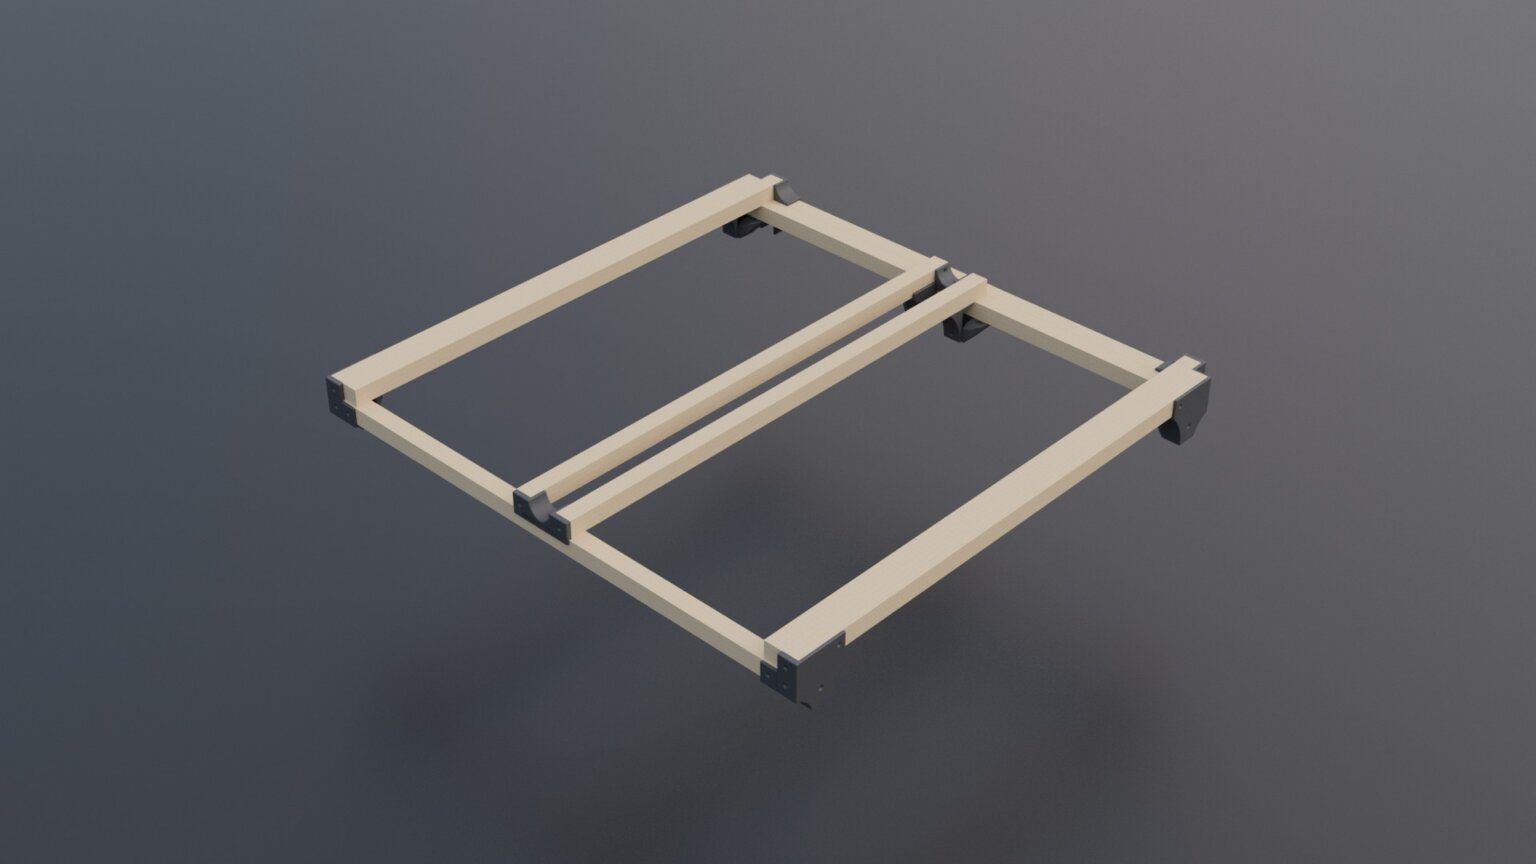
For the following steps, it’s easier to extend the scaffold while it’s still folded. So, for now, simply push the scaffold together.
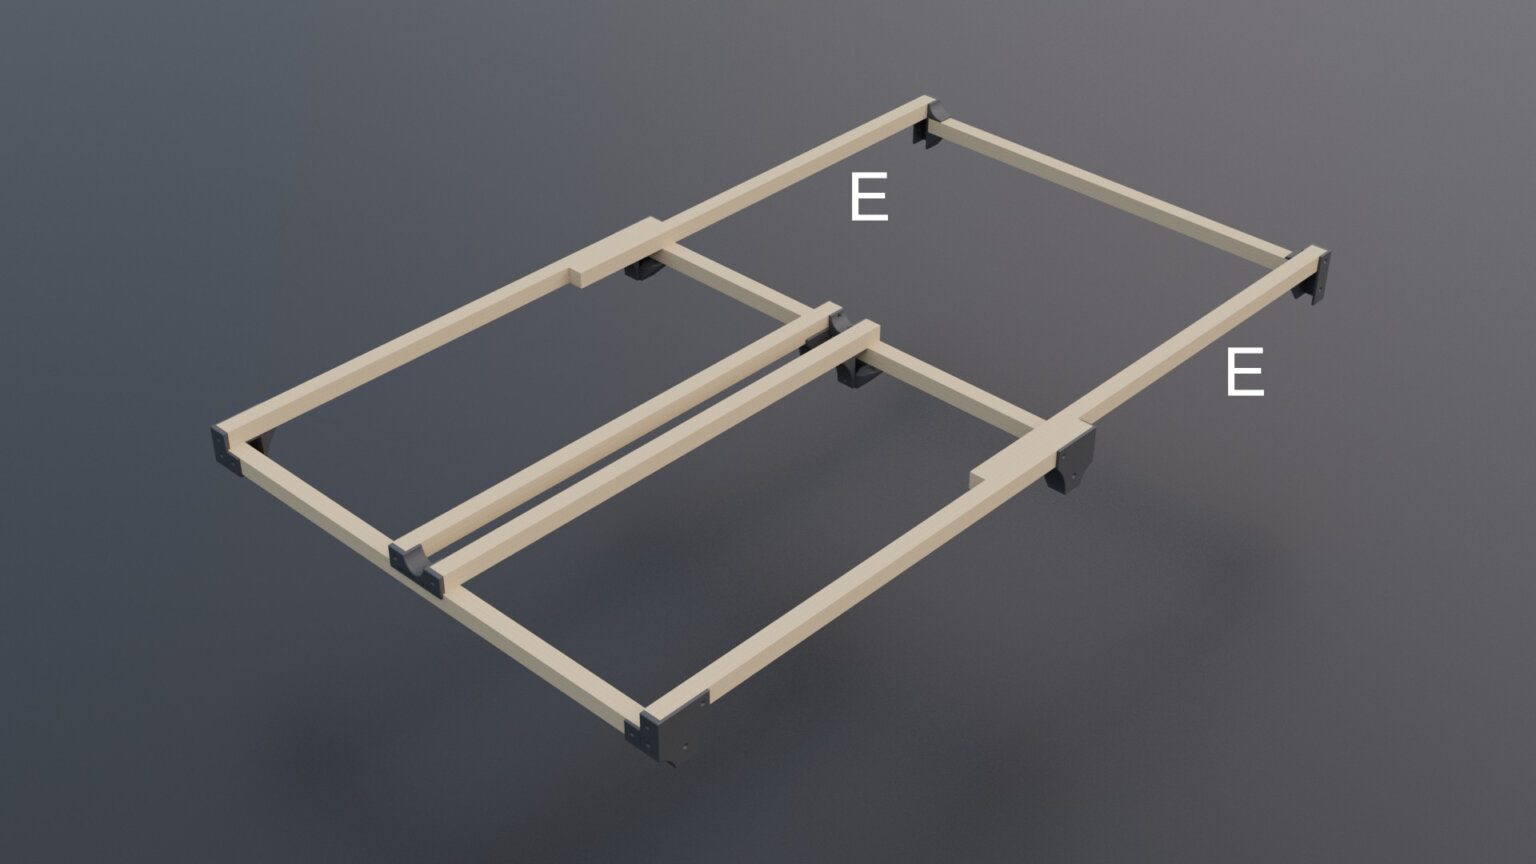
Step 13
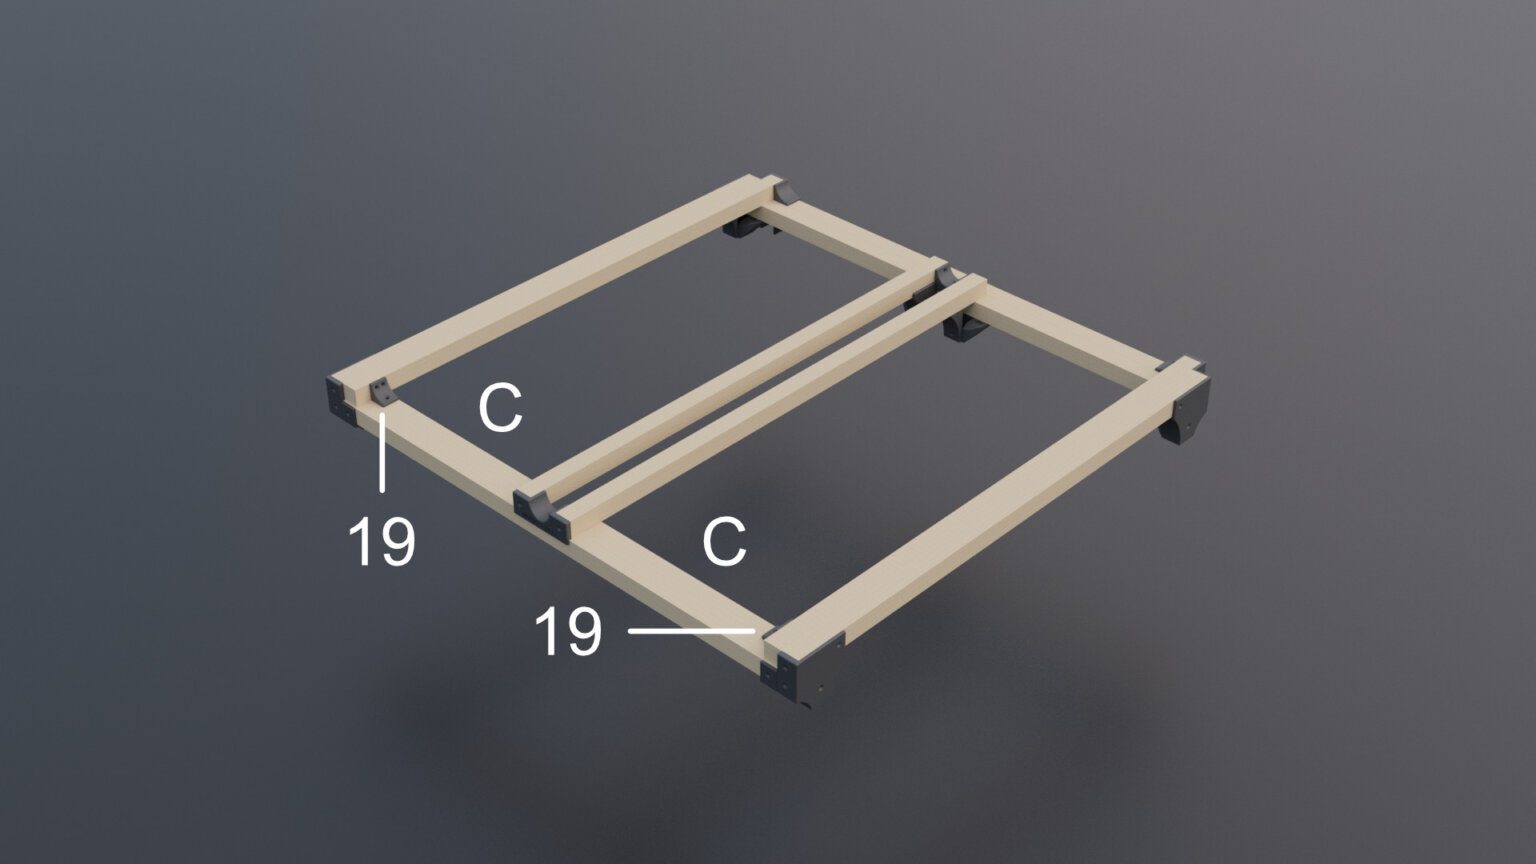
Next, the two pieces of wood C are placed at the back of the frame as shown and screwed to the pieces of wood E using the connectors (19).
Step 14
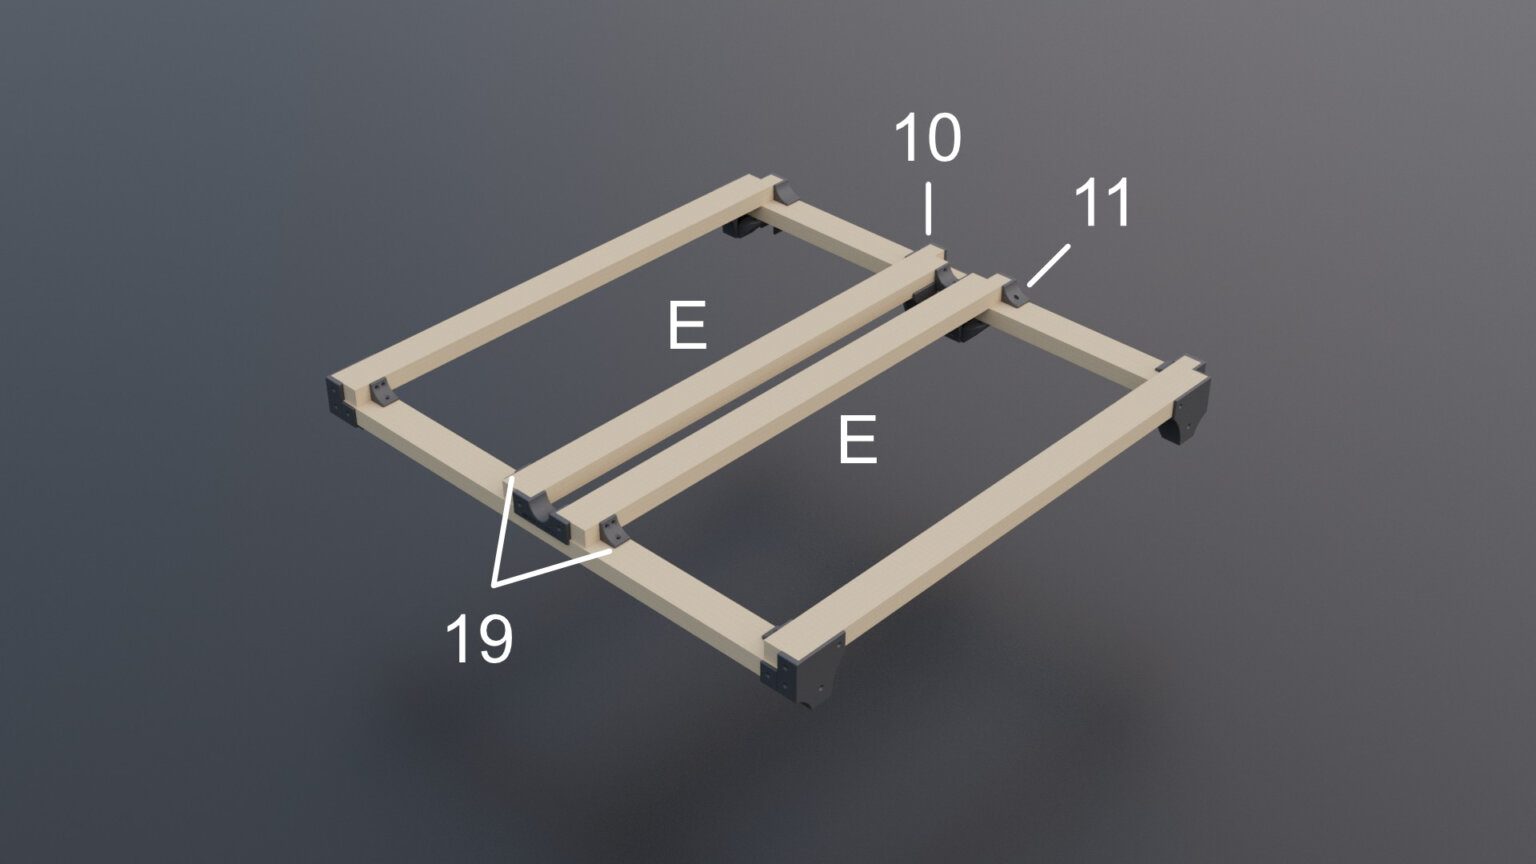
Now place two more pieces of wood E in the middle of the frame and screw them to the other pieces of wood using parts (10) (11) and (19).
Step 15
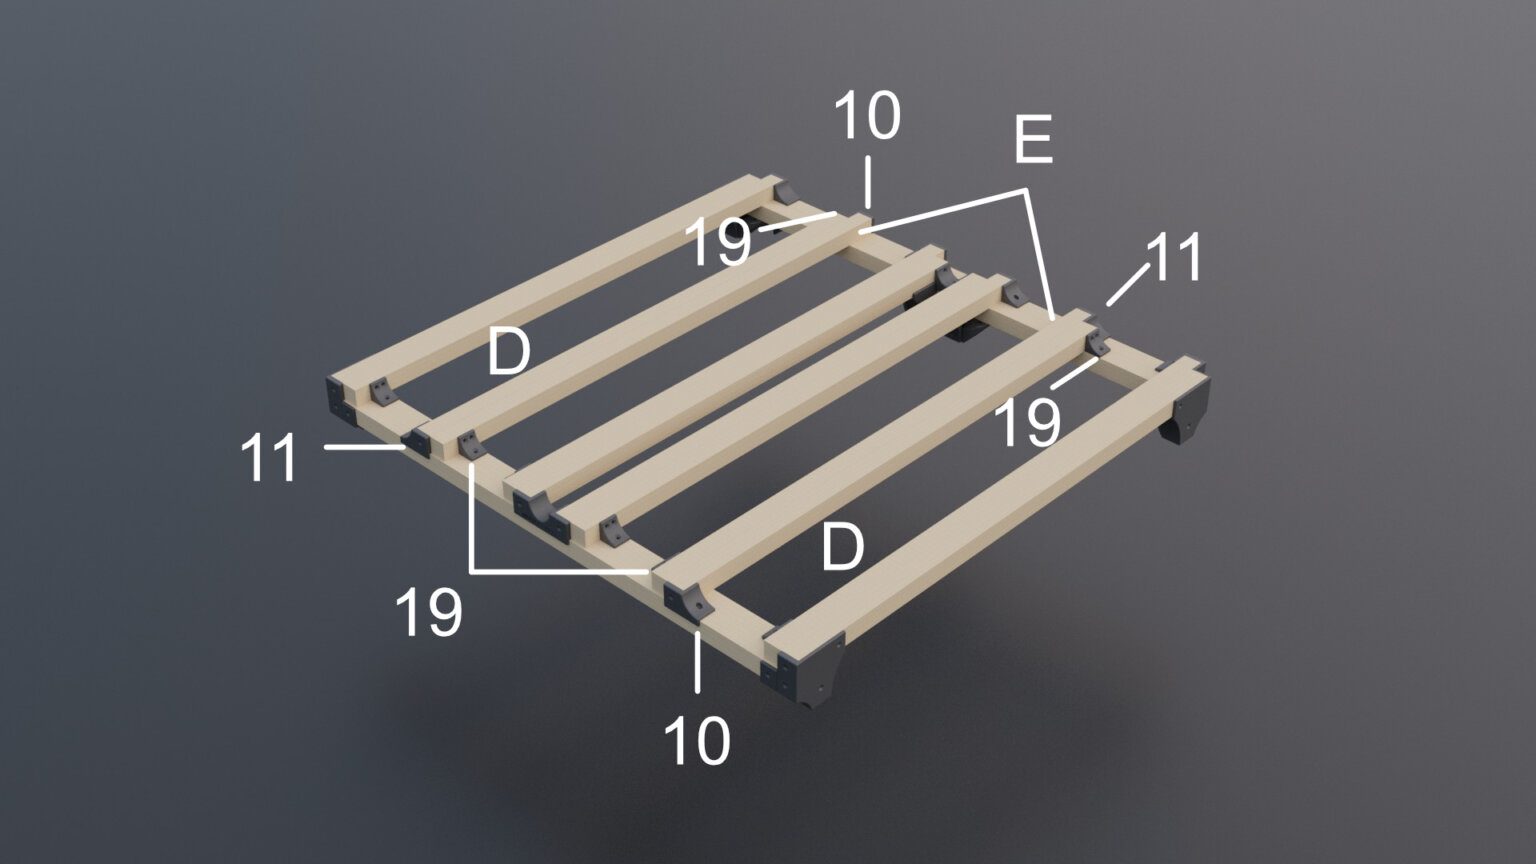
Now, both sides of the frame are completed with additional pieces of wood. To do this, place a piece of wood D and a piece of wood E on the left side, with the piece of wood D on the far left. Screw the piece of wood D to the back part (11) and the connector (19) at the front. Then, screw the piece of wood E to the connector (19) at the back and the connector (10) at the front.
Repeat the same process, mirrored, on the right side. Wood D is again on the outside right and is screwed to the connector (10) at the back and to the connector (19) at the front. Wood E is screwed to the connector (19) at the back and to the connector (11) at the front.
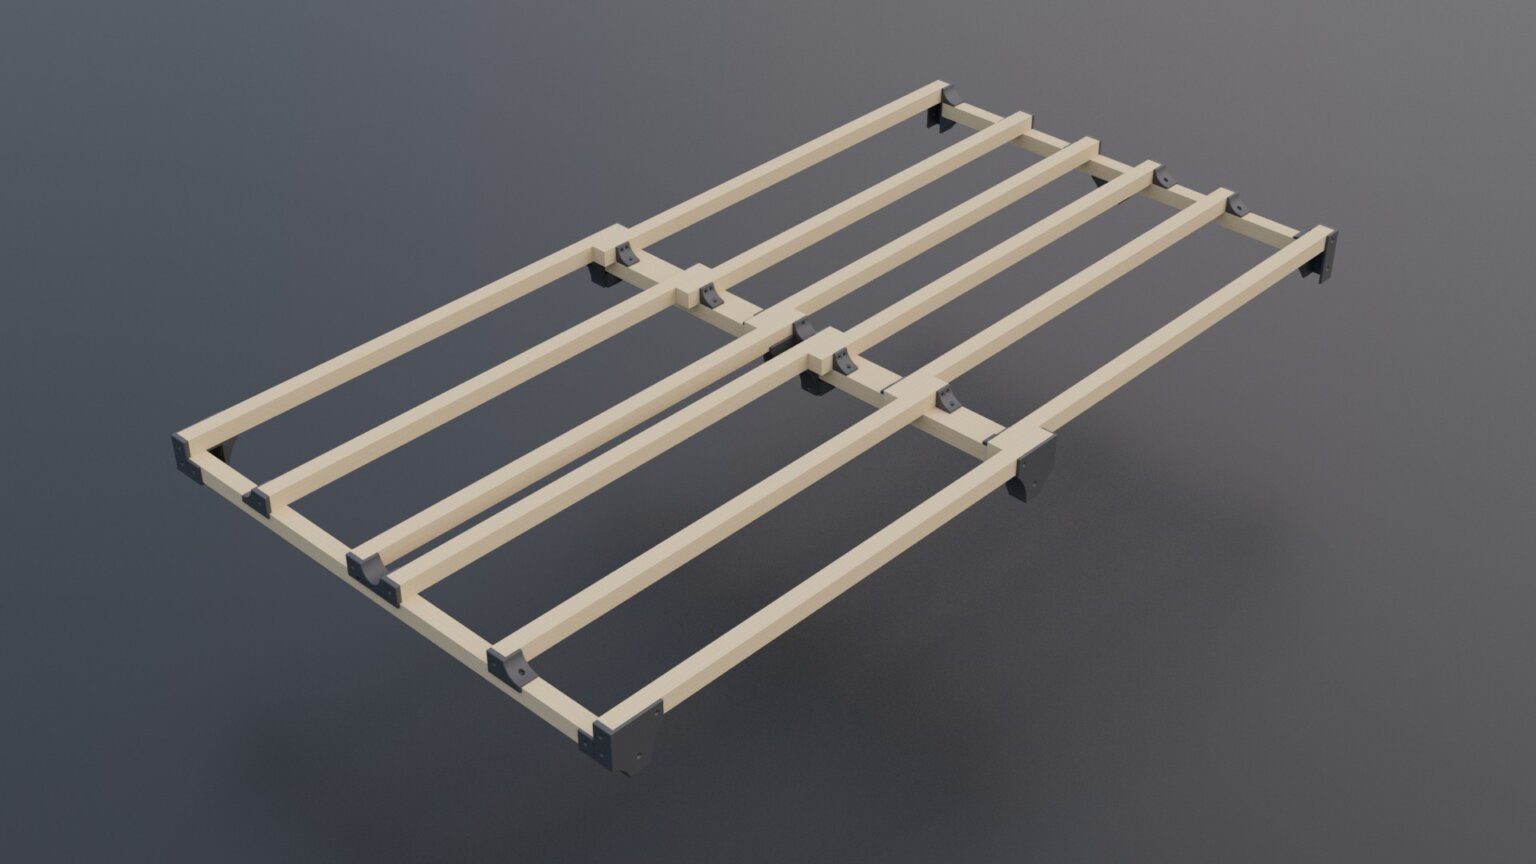
Step 16
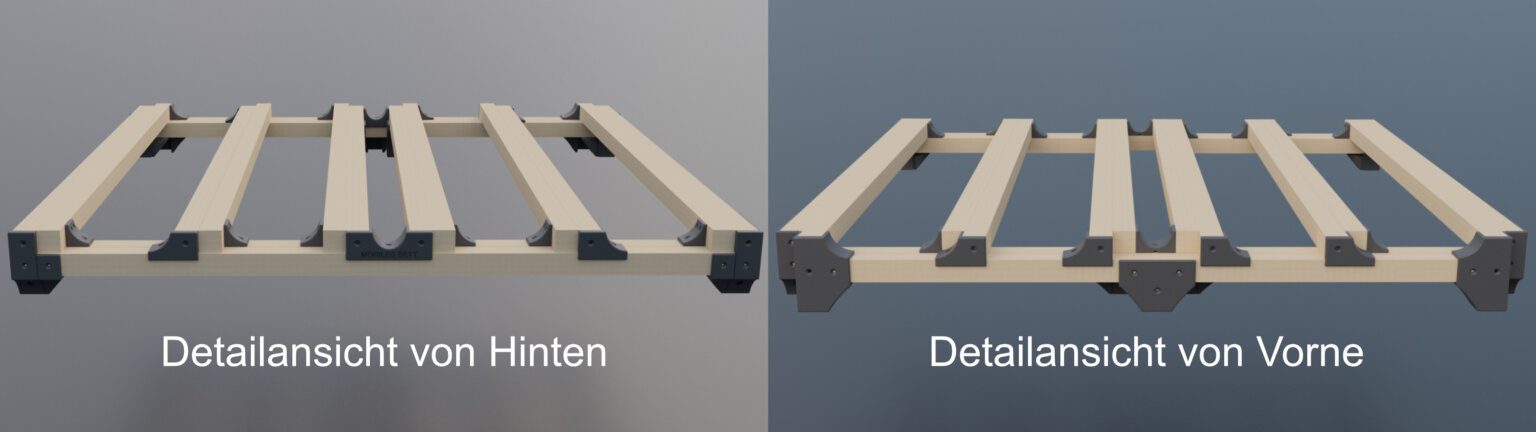
If you’ve done everything correctly up to this point, you can now extend the scaffolding forward. Ideally, nothing will jam, and the scaffolding can be extended and retracted without any problems.
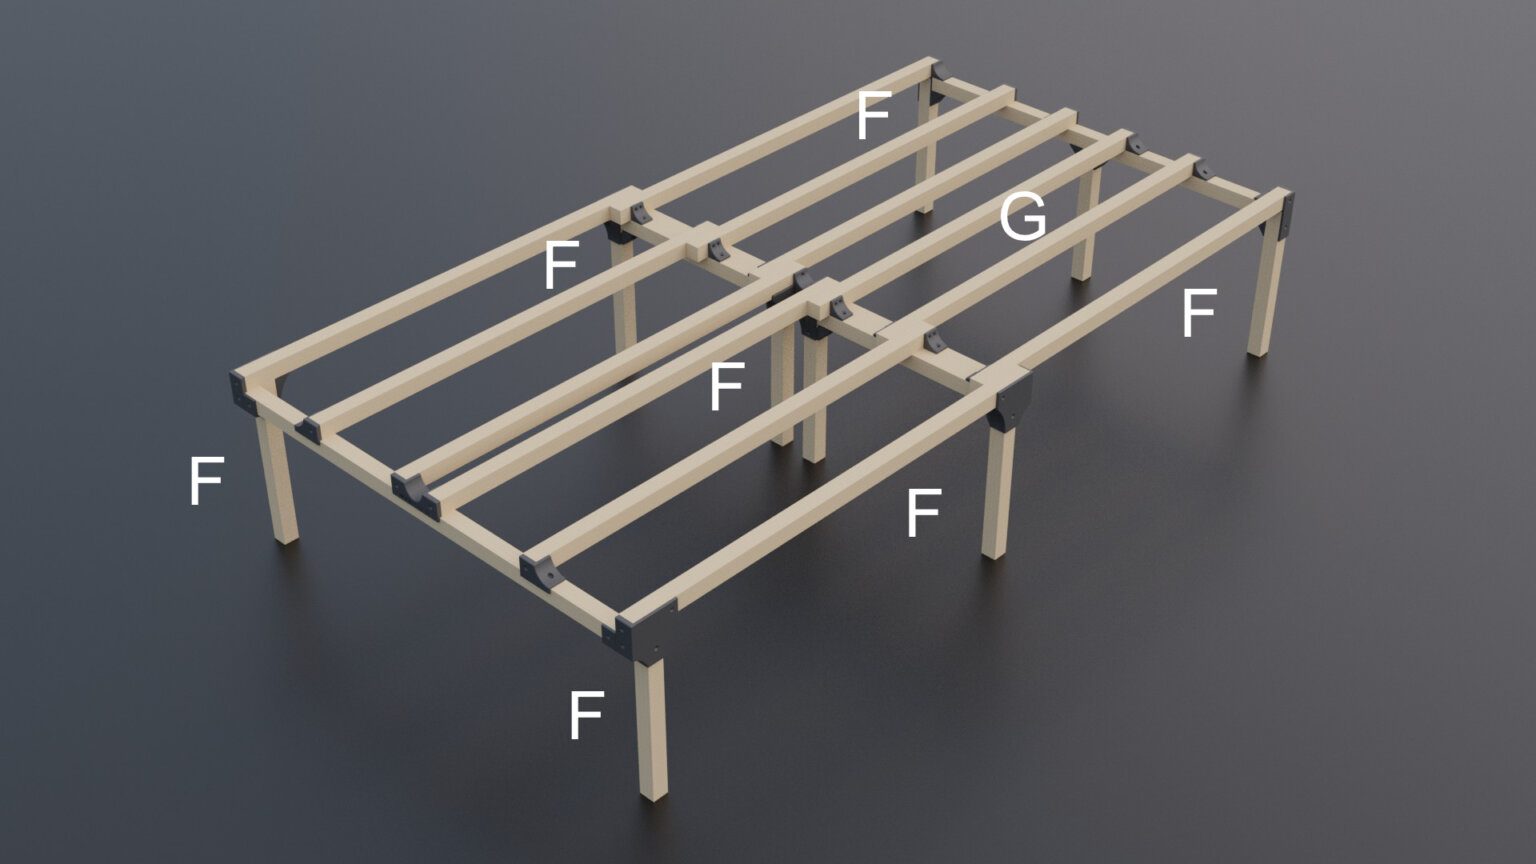
Step 17
Now the scaffolding feet F and G are inserted into the connectors at the bottom and screwed to the scaffolding.
Schritt 18
Bevor wir mit dem nächsten Schritt am Bettgerüst weiter machen können, müssen wir noch die Gerüstfüße zusammensetzen. Das machst du, indem du zuerst den Gummirahmen von unten über den Gerüstschuh ziehst bzw. die zwei Teile zusammendrückst. Danach klebst du den Gummiboden einfach unten in die Mitte des Gummirahmens am Gerüstfuß fest.
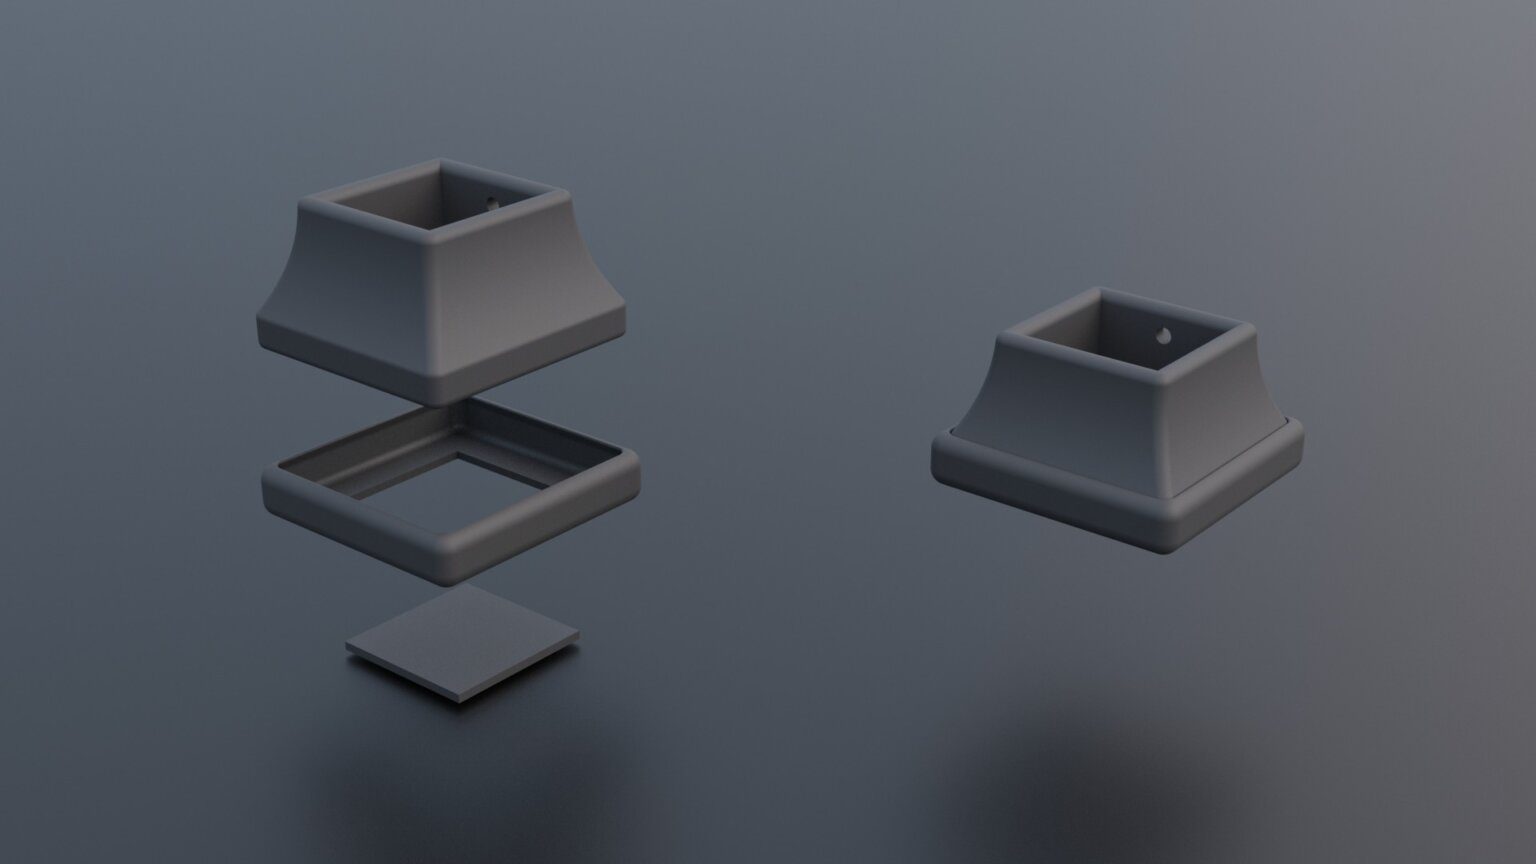
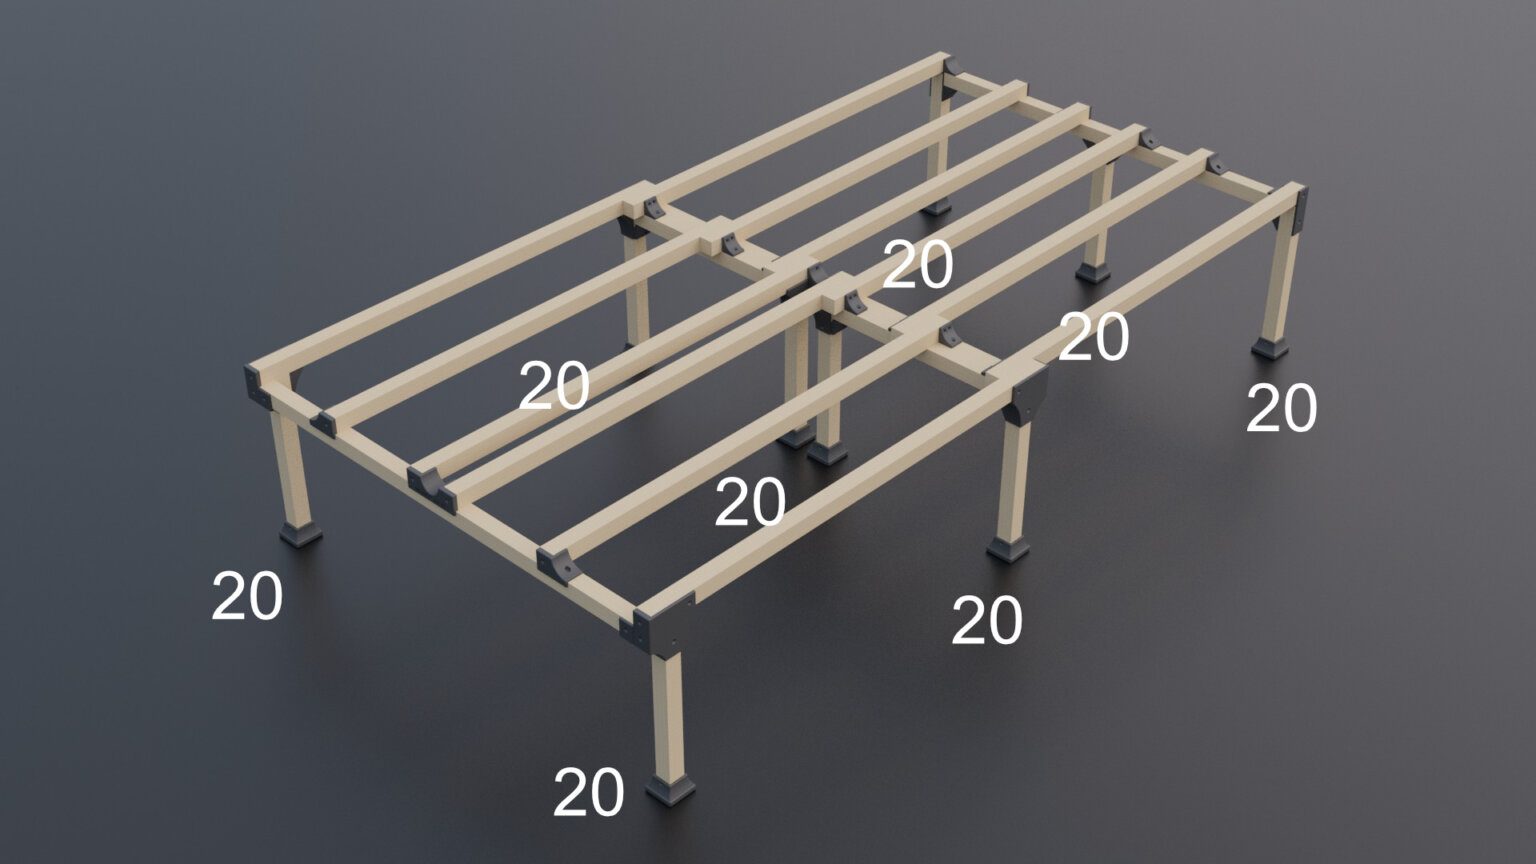
Step 19
To finalize the bed frame, all that remains is to attach the scaffold shoes (20) to the scaffold feet and screw them together.
Step 20
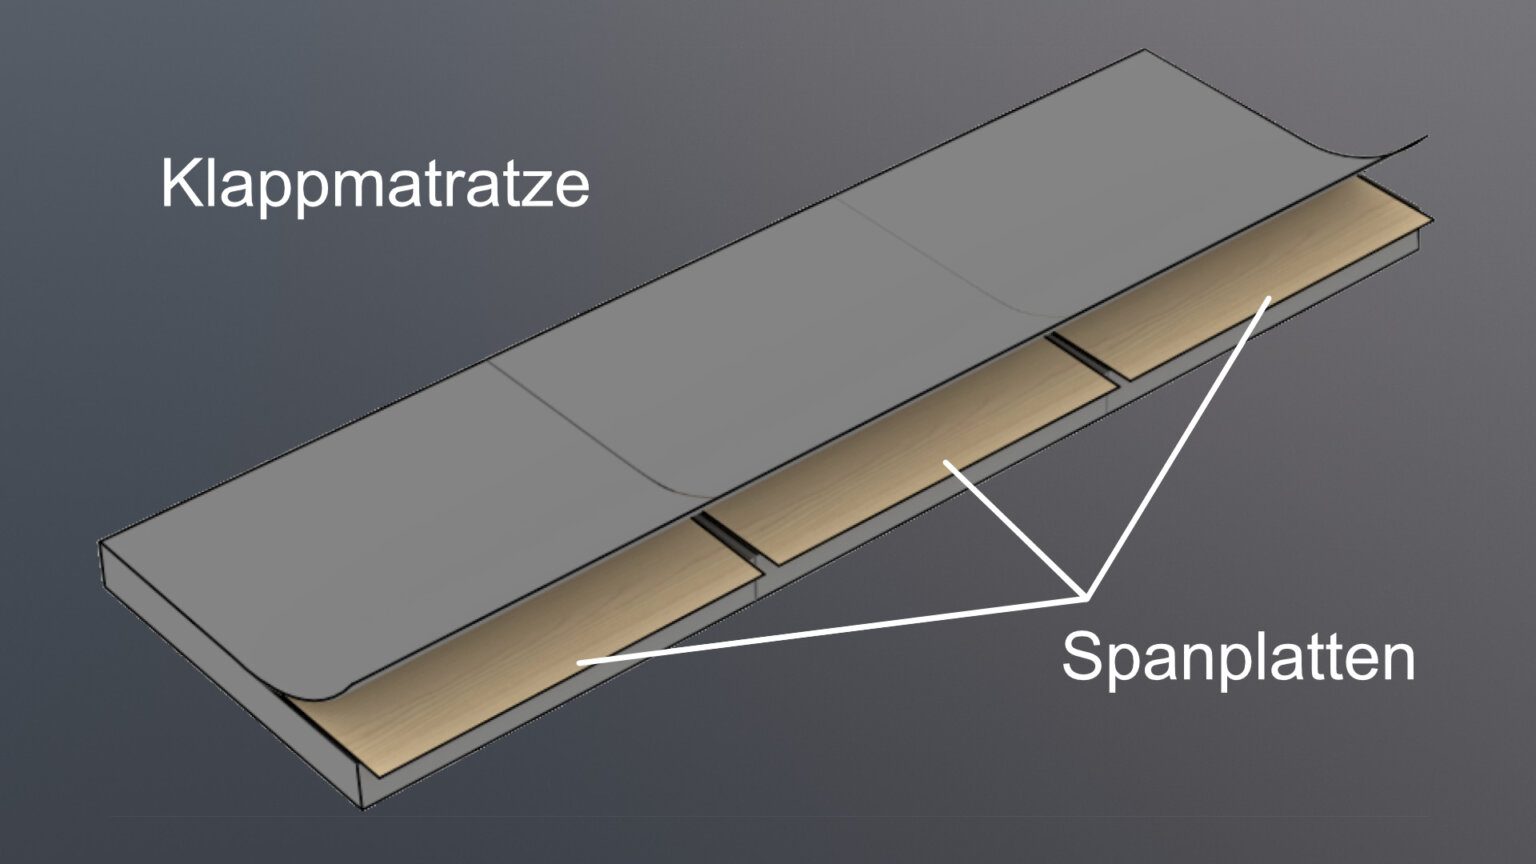
Finally, the chipboard panels are placed inside the mattress cover. To do this, simply unzip the mattress cover and place the panels on top of the cold foam in the mattress. The chipboard panels don’t need to be glued or secured in any other way. The mattress cover automatically holds them in place.
Final Mobiles Bett
Finally, all you have to do is put the bed in your car and your final mobile bed is ready!
We wish you many wonderful trips and exciting adventures with your new mobile bed!
Have a good arrival!
Für den Newsletter anmelden
Erhalte Rabatte, spannende Neuigkeiten, neue Produkte und Stories rund um das Thema Minicamper!
Für den Newsletter anmelden
Erhalte Rabatte, spannende Neuigkeiten, neue Produkte und Stories rund um das Thema Minicamper!
Rechtliches
Community
© 2024 MOBILES BETT